Shelly BLU TRV devices cannot be encrypted (BTHome used to report temperatures); in addition, if you use an external Shelly sensor (eg. Shelly H&T), it could not be encrypted.
Lorsque j’ai emménagé dans ma nouvelle maison à Namur, j’ai eu la bonne surprise de découvrir une installation de chauffage tout à fait opérationnelle. Pas de panne, pas de radiateurs froids, et une chaudière fonctionnelle. Bref, rien qui nécessitait d’intervention lourde ou de remplacement complet.
Mais si tout marchait, rien n’était vraiment optimisé. L’installation ne bénéficiait d’aucune automatisation, les vannes thermostatiques étaient d’un autre âge, et la gestion du chauffage reposait essentiellement sur des réglages manuels et approximatifs.
Plutôt que de tout repenser, l’objectif est aujourd’hui de m’adapter à l’existant, et d’adapter l’existant à mes besoins. En gardant la base en place, j’ai entamé une série de petites améliorations : remplacement des vannes, ajout d’un pilotage plus intelligent par pièce, et une couche d’automatisation pour rendre l’ensemble plus confortable et plus réactif au quotidien.
Adapter la chaudière
Ma maison est équipée d’un chauffage central au gaz, pas idéal d’un point de vue émissions de CO₂, mais pour l’instant, c’est ce qui est en place… et ça fonctionne bien. L’idée n’est donc pas (encore) de tout changer, mais de voir comment limiter la consommation à court terme, tout en gardant une porte ouverte pour une éventuelle conversion vers une énergie plus propre à moyen ou long terme.
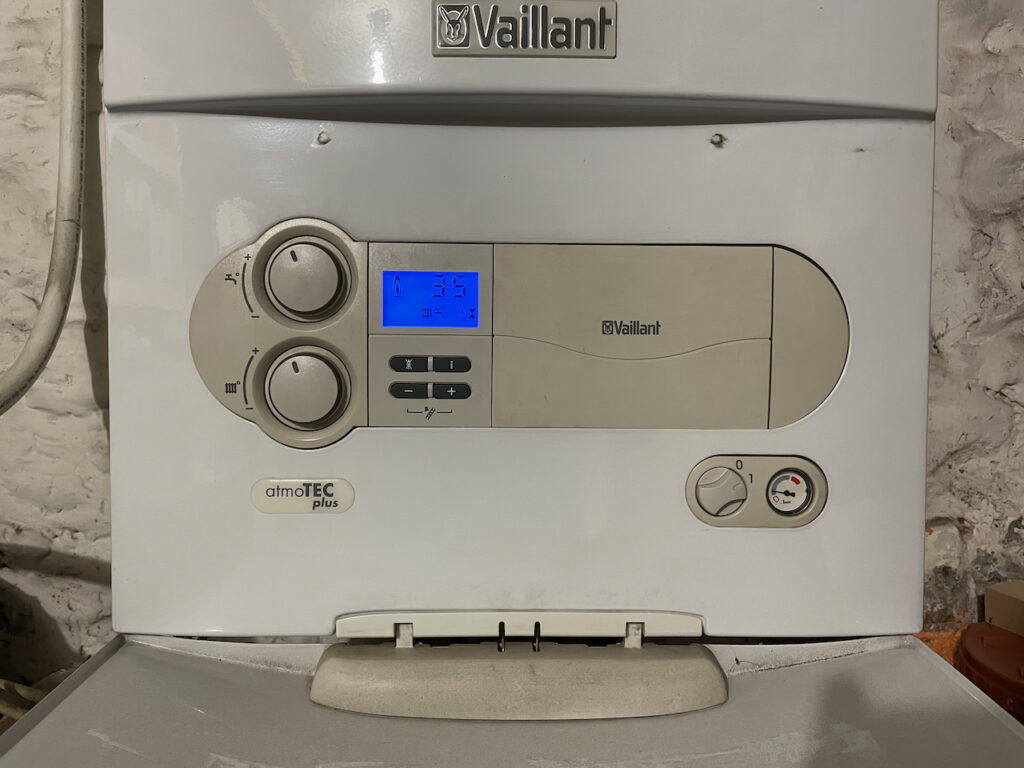
La chaudière en question est une Vaillant atmoTEC plus, un modèle atmosphérique. Contrairement aux chaudières à condensation, qui récupèrent une partie de la chaleur des fumées de combustion pour améliorer leur rendement, les chaudières atmosphériques comme celle-ci brûlent le gaz de manière plus « simple », avec une perte énergétique plus importante. Bref, ce n’est pas la plus efficace, mais elle a l’avantage d’être relativement neuve et… surtout déjà là.
Premier constat à l’emménagement : aucun thermostat d’ambiance. En fait, comme la maison était subdivisée en un appartement et quatre kots, chaque espace avait ses propres vannes, mais aucune gestion centralisée. Ajoutez à cela l’absence totale de sonde extérieure, et vous obtenez un système qui chauffe, oui, mais à l’aveugle.
Autre détail (plutôt absurde) : ce type de chaudière a besoin d’avoir au moins un radiateur ouvert en permanence. Sinon, elle se met en sécurité. Pas super pratique quand on cherche justement à mieux contrôler la chaleur pièce par pièce…
Première piste : écouter la chaudière
Pour mieux comprendre ce que fait la chaudière (et pourquoi), je me suis tourné vers ebusd, un projet open source qui permet de communiquer avec certaines chaudières Vaillant via le bus eBUS. En gros, cela permet de lire et collecter les données internes de la chaudière : température de l’eau, état de fonctionnement, pressions, etc.
J’ai utilisé le chip eBUS C6 d’Elecrow (disponible ici), qui se branche sur le bus eBUS d’un côté et de l’autre ESP32 (donc Wifi). Très vite, j’ai pu visualiser pas mal d’informations via ebusd. Le souci ? Lire, oui. Agir, non. Sans un module de contrôle Vaillant supplémentaire, il est très difficile de modifier les consignes ou d’interagir avec la chaudière. Dommage, car ça limite l’intérêt du système pour une automatisation complète.
Je garde tout de même ebusd actif, et il est bien intégré dans Home Assistant, donc peut-être que j’exploiterai davantage ces données à l’avenir. Un article plus technique suivra sûrement là-dessus.
Solution retenue : simplicité et efficacité
Module Shelly Mini 1 gen3 installé dans la chaudière sur bornes 3 et 4.
En attendant, j’ai opté pour une solution KISS (Keep It Simple, Stupid). Sur la carte mère de la chaudière, un connecteur permet de brancher un simple thermostat on/off (bornes 3 et 4). J’ai donc câblé un petit Shelly 1 Mini, que je peux activer ou désactiver via Home Assistant. Quand il est “on”, la chaudière chauffe (selon sa courbe interne). Quand il est “off”, elle reste au repos.
Ce n’est pas une régulation très fine — je ne peux pas modifier la courbe de chauffe, par exemple — mais c’est largement mieux que rien. Et surtout, ça fonctionne de manière fiable et sans prise de tête.
Remplacer les vannes : entre attentes et compromis
Au départ, je cherchais simplement des vannes thermostatiques connectées en Wi-Fi. Ayant déjà pas mal de modules Shelly dans la maison, j’espérais secrètement une version 2 des vannes Shelly TRV : quelque chose de fiable, simple à intégrer et connecté directement sans hub supplémentaire.
Mais rapidement, je me suis heurté à un problème assez classique avec les vannes Wi-Fi : elles consomment beaucoup de batterie. Et c’est probablement pour ça qu’on en trouve très peu sur le marché, ou qu’elles finissent par être abandonnées. Une vanne qui doit se reconnecter constamment au réseau Wi-Fi, ça vide les piles en un rien de temps…
L’alternative Shelly : la BLU TRV
J’ai finalement patienté un peu, et Shelly a sorti un nouveau modèle, la BLU TRV. C’est une vanne Bluetooth, mais que l’on peut contrôler à distance via un dongle gateway Wi-Fi/Bluetooth (également proposé par Shelly). Les vannes sont aussi compatibles Zigbee, ce qui ouvre d’autres possibilités d’intégration (pas testé puisque que pas de Zigbee dans mon cas).
Il faut avouer que les premières versions — tant des vannes que des gateways — étaient un peu capricieuses. Bugs, connexions instables, comportement imprévisible… Pas idéal. Mais les dernières mises à jour ont bien stabilisé l’ensemble, et aujourd’hui ça tourne correctement chez moi.
Quelques limites côté ergonomie
Je dois cependant souligner deux petits défauts d’ergonomie. D’abord, le système de commande physique : tout le tour de la vanne tourne pour faire différents réglages selon les mouvements autour du corp de la vanne (sorte d’anneau de commande). C’est… original, mais pas forcément intuitif. Ensuite, l’affichage : il est situé dans l’axe de la vanne, ce qui le rend illisible dans la majorité de mes configurations, sauf si il s’agit d’une vanne « équerre » (avec le module thermostatique qui se met de face).
Dans mon cas, ces limitations sont secondaires : je n’interagis jamais physiquement avec les vannes. Tout est automatisé, les températures sont gérées pièce par pièce depuis Home Assistant, et je n’ai pas besoin de tourner quoi que ce soit à la main. Mais si vous comptez les utiliser manuellement, ces points peuvent faire la différence dans votre choix.
Ce n’est pas le produit parfait, mais pour mon usage — zéro interaction manuelle, tout en automatique — c’est une solution cohérente, intégrée et stable
Une couche d’automatisation pour tout orchestrer
Pour tirer pleinement parti des vannes connectées et rendre le système de chauffage réellement intelligent, j’ai mis en place une automatisation personnalisée dans Home Assistant. L’idée est simple : chaque pièce devient un petit écosystème autonome, capable de réguler sa température selon l’usage réel.
Concrètement, pour chaque pièce j’utilise :
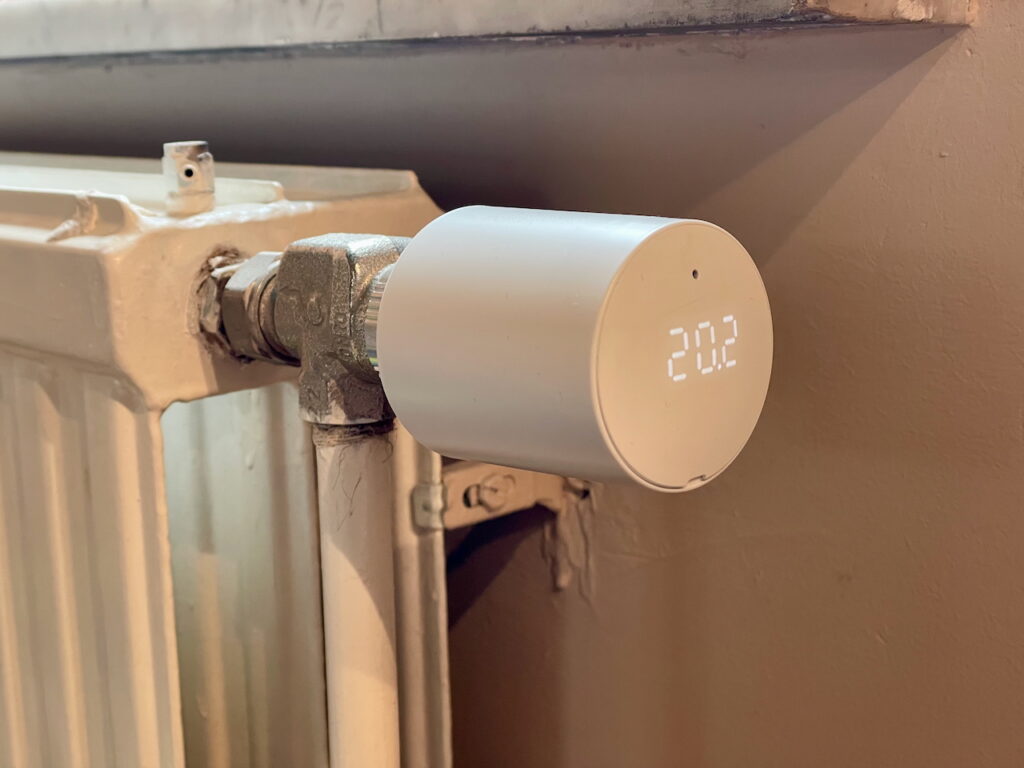
• une ou plusieurs vannes thermostatiques connectées (Shelly BLU TRV),
Côté capteur de présence, j’utilise ce modèle un peu moche mais très efficace : le Human Presence Sensor d’Athom**. Je reviendrai plus en détail sur ce capteur dans un autre article, mais pour l’instant, retenez qu’il fait bien le job pour détecter une présence réelle et continue, même en cas d’activité faible (lecture, travail, etc.).
Un template Home Assistant pour tout centraliser
J’ai opté pour un blueprint générique, conçu avec l’aide de l’AI, et que j’applique à chaque pièce avec quelques paramètres.
Ce blueprint prend en compte plusieurs conditions pour ajuster la température intelligemment.
1. Fonctionnement normal : présence détectée
Si une présence est détectée dans une pièce pendant un certain temps (par exemple 10 minutes), la vanne règle automatiquement la température sur une valeur de confort (typiquement 21°C). En cas d’absence prolongée (aussi configurable), la température redescend à une valeur plus basse (par exemple 17°C).
2. Aération ou porte ouverte
Si une fenêtre ou une porte reste ouverte plus de deux minutes, la vanne passe automatiquement à 4°C pour ne pas chauffer dans le vide. Une sécurité utile quand on oublie de fermer une porte (plus personne n’oublie de fermer les portes depuis!)ou quand on aère une pièce le matin.
3. Préchauffage via calendrier
Le blueprint peut aussi s’appuyer sur un agenda (calendrier Home Assistant) pour lancer le chauffage à des moments précis, avant même que quelqu’un ne soit détecté.
C’est ce que j’utilise dans les pièces de vie le matin (chauffage qui démarre avant le lever), ou dans le bureau les jours de télétravail, selon mon emploi du temps. J’utilise l’agenda ici pour le pré-chauffage, le capteur de présence prenant ensuite le relais pour maintenir ou couper la chauffe selon la réalité du moment.
4. Mode absence forcée
Un capteur binaire (virtuel ou physique) peut aussi être utilisé pour forcer une température d’absence. Typiquement scène « absence » ou « nuit ».
Un système souple, fiable et autonome
Chaque pièce suit donc sa propre logique, tout en restant intégrée dans l’écosystème Home Assistant. Je peux ajuster les paramètres à la volée, surveiller les températures et les consignes, ou forcer des exceptions si besoin. Et surtout, plus besoin de toucher aux vannes : tout est automatisé, intelligent, et économe..
Contrôler la chaudière et un interrupteur général pour couper tout
En complément du système pièce par pièce, j’ai mis en place une automatisation supplémentaire qui observe l’état de toutes les vannes thermostatiques. L’idée est simple :
• Si au moins une vanne est ouverte à plus de 25 %, la chaudière s’allume.
• Si aucune vanne ne dépasse ce seuil, le chauffage reste coupé.
Pourquoi 25 % ? Parce que les la position des corps des vannes n’est pas toujours très précise. À un seuil plus bas, la chaudière s’arrêtait parfois car l’eau ne pouvais circuler.
Voici l’automatisation en question, dans Home Assistant :
Dernier élément de l’installation : un interrupteur général pour le chauffage. C’est un interrupteur virtuel dans Home Assistant que j’active en cas de vacances, ou quand la belle saison revient. Lorsqu’il est désactivé, il force le module Shelly de la chaudière à rester éteint, quelle que soit la demande venant des pièces.
C’est une sécurité simple, mais efficace, pour éviter toute consommation inutile quand il n’y a vraiment plus besoin de chauffer.
En résumé
Sans changer toute l’installation, j’ai réussi à moderniser le chauffage pièce par pièce, en ajoutant des capteurs, des vannes intelligentes, et une bonne dose d’automatisation. Après quelques semaine de tests, l’ensemble est fiable, réactif, économe… et surtout adapté à mes usages réels. Tout cela avec un budget raisonnable, sans devoir tout remplacer et surtout avec aucune interaction manuelle.
D’autres ajustements viendront peut-être, notamment au niveau de l’interaction avec la chaudière via eBUS, ou de l’optimisation de certaines logiques dans Home Assistant. Mais pour l’instant, l’ensemble fait le job — et bien.
Existing Heating System: How I Made It Smarter
When I moved into my new house, I was pleasantly surprised to find a fully operational heating system. No breakdowns, no cold radiators, and a boiler that worked just fine. In short, nothing that required heavy intervention or a complete overhaul.
But while everything worked, nothing was really optimised. The system had zero automation, the thermostatic valves were from another era, and heating control relied entirely on manual and imprecise adjustments.
Rather than redesigning the whole thing, the idea is to adapt to the existing setup, and adapt it to my needs. By keeping the basic system intact, I started a series of small upgrades: replacing the valves, adding smarter room-by-room control, and a layer of automation to make the system more comfortable and responsive day to day.
Boiler: adapting the core
My home is equipped with a gas central heating system — not great for CO₂ emissions, but for now, it’s what’s installed… and it works well. So the goal isn’t (yet) to change everything, but to reduce consumption in the short term, while keeping options open for switching to a cleaner energy source in the future.
The boiler is a Vaillant atmoTEC plus, an atmospheric model. Unlike condensing boilers, which recover heat from exhaust gases to improve efficiency, atmospheric boilers burn gas more “simply”, resulting in greater energy loss. Not ideal — but the unit is relatively new and, above all, already there.
First observation when moving in: no central thermostat. Since the house was previously divided into one apartment and four student studios, each had its own manual valves, but no central management. Add to that the complete lack of an outdoor temperature sensor, and you get a system that heats — yes — but blindly.
Another (rather absurd) detail: this type of boiler requires at least one radiator to stay open at all times. Otherwise, the boiler goes into safety mode. Not very practical when you’re trying to improve room-by-room heating control…
Step one: listening to the boiler
To better understand what the boiler was doing (and why), I looked into ebusd, an open-source project that allows communication with some Vaillant boilers via the eBUS protocol. In short, it lets you read and collect internal datafrom the boiler: water temperature, operating status, pressure, etc.
I used the eBUS C6 adapter from Elecrow (available here), which connects to the eBUS line on one end and to an ESP32 (Wi-Fi capable) on the other. Pretty quickly, I was able to visualize a lot of boiler data via ebusd. The issue? Reading data is easy. Controlling the boiler is not. Without an additional Vaillant control module, it’s very difficult to change settings or send commands. Too bad — it limits the system’s automation potential.
Still, I keep ebusd running and integrated with Home Assistant, so I may explore it more in the future. A dedicated technical article will likely follow.
Simple and Effective: The Solution I Chose
Shelly Mini 1 gen3 installed in the heating boiler mother board ( 3 and 4 pin).
In the meantime, I went for a KISS approach (Keep It Simple, Stupid). The boiler’s motherboard includes a connector for a basic on/off thermostat (pin 3 and 4). So I hooked up a Shelly 1 Mini, which I can toggle via Home Assistant. When it’s “on”, the boiler heats (based on its internal curve). When it’s “off”, it stays idle.
It’s not the most precise regulation — I can’t modify the heat curve, for example — but it’s far better than nothing. And above all, it works reliably and without headaches.
Replacing the Valves: Expectations vs. Reality
At first, I was looking for Wi-Fi-connected thermostatic valves. Since I already use many Shelly modules in the house, I was hoping for a second-generation Shelly TRV: something reliable, easy to integrate, and working without a hub.
But I quickly ran into the usual problem with Wi-Fi valves: they drain batteries. That’s probably why they’re rare — or end up discontinued. A valve constantly reconnecting to Wi-Fi burns through batteries in no time…
The Shelly Alternative: BLU TRV
Eventually, I waited a bit, and Shelly released a new model, the BLU TRV. It’s a Bluetooth valve, remotely controllable via a Wi-Fi/Bluetooth gateway dongle (also from Shelly). The valves are also Zigbee-compatible, which opens up other integration options (not tested here — I don’t use Zigbee).
To be fair, the first firmware versions (both valves and gateways) were a bit buggy: unstable connections, weird behaviors… not great. But recent updates have stabilized everything, and the system is now working smoothly for me.
A Few Ergonomic Limitations
That said, two small downsides worth mentioning:
• The physical control ring: the entire outer shell of the valve rotates to change settings depending on how you move it. It’s… unique, but not exactly intuitive.
• The display orientation: it’s aligned with the valve’s axis, which makes it unreadable in most cases — unless your valve is mounted facing forward (like with angled radiator connections).
Personally, these limitations don’t matter: I never interact with the valves manually. Everything is automated via Home Assistant, and I don’t need to touch a thing. But if you’re planning to use them manually, this could be a dealbreaker.
It’s not a perfect product, but for my use — fully automated, no manual interaction — it’s a solid, integrated and stable solution.
A Layer of Automation to Orchestrate It All
To fully leverage the smart valves and make the heating system truly intelligent, I set up custom automation in Home Assistant. The idea: each room becomes a mini-autonomous climate zone, adjusting temperature based on actual usage.
For presence detection, I use this slightly ugly but very effective device: the Human Presence Sensor from Athom. I’ll go deeper into it in another article, but for now just know that it does a great job detecting real, continuous presence — even during quiet activities like reading or working.
One Automation Template to Rule Them All
Instead of building a different automation for every room, I created a generic blueprint (with the help of ChatGPT) and apply it to each zone with a few parameters.
The blueprint takes several scenarios into account to intelligently control the heating:
1. Normal behavior: presence detected
If presence is detected for a certain time (e.g., 10 minutes), the valve sets the comfort temperature (e.g., 21°C). After extended absence, it lowers the temperature to an energy-saving value (e.g., 17°C).
2. Window or door open
If a window or door is left open for more than 2 minutes, the valve switches to 4°C to avoid heating into thin air. A simple but effective safeguard. (Since I implemented this… no one forgets to close doors anymore!)
3. Pre-heating via calendar
The blueprint can use a Home Assistant calendar to preheat a room before someone is even present.
I use this in living spaces in the morning (heating kicks in before we wake up), and in the home office on work-from-home days. The calendar handles the pre-heating, while the presence sensor takes over for fine-tuned control.
4. Forced absence mode
A virtual or physical binary sensor can enforce absence temperature, useful for “away” or “night” modes.
A Flexible, Reliable, Autonomous System
Each room follows its own logic while remaining fully integrated in the Home Assistant ecosystem. I can adjust thresholds on the fly, monitor temperatures and settings, or apply exceptions when needed. And best of all: no need to touch the valves — it’s all automatic, smart, and energy-efficient.
Controlling the Boiler and a Master Switch to Shut Everything Down
In addition to the room-by-room setup, I’ve added a supplementary automation that monitors the position of all thermostatic valves. The idea is simple:
• If at least one valve is open more than 25%, the boiler is turned on.
• If none of the valves exceed that threshold, the heating stays off.
Why 25%? Because valve body position aren’t always perfectly accurate. With a lower threshold, the boiler would sometimes shut off because water cannot circulate.
The final piece of the setup is a master switch for the heating system. It’s a virtual switch in Home Assistant that I toggle when we go on holiday or once the warm season arrives. When it’s off, it forces the Shelly switch on the boiler to stay off, no matter what any room might be asking for.
It’s a simple but effective safeguard to avoid any unnecessary heating when it’s clearly no longer needed.
In Summary
Without replacing the entire system, I’ve managed to modernize my heating setup room by room, adding sensors, smart valves, and a healthy dose of automation. After a few weeks of testing, it’s proving to be reliable, responsive, and energy-efficient — all tailored to my real-life usage.
And all this with a reasonable budget, no major changes, and zero manual interaction.
More refinements may come later, especially in terms of eBUS integration or automation logic optimisation in Home Assistant. But for now, the system just works — and works well.